Photo Retouching

retouch clean edit any photo in photoshop and lightroom
Exclusive on fiverr by bernyelie

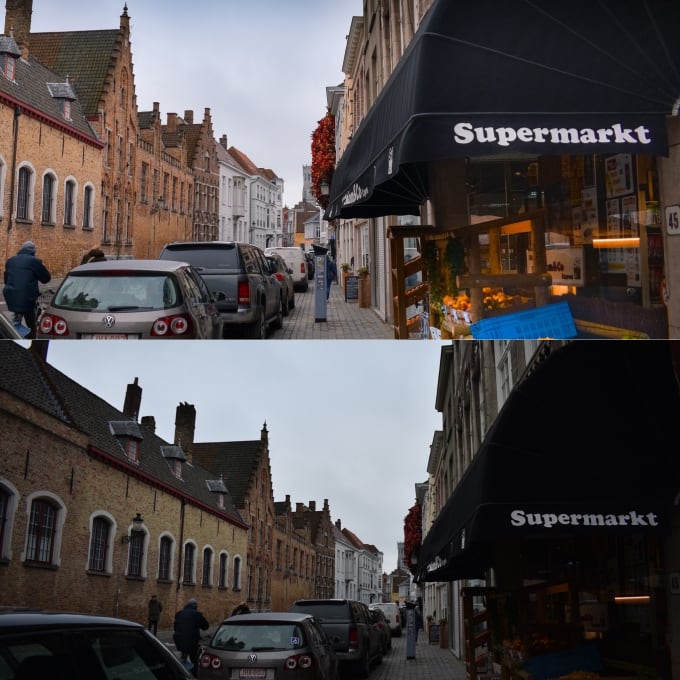
Advanced photography has made it conceivable to photo in shading and later in the PC the picture taker can choose if the air can be better depicted clearly.

Shading has a major impact in the production of climate, it is more enthusiastically to make a barometrical picture in high contrast than in shading. The explanation is that once you evacuate the shading the picture can just remain on the tones.

A few cameras do have a highly contrasting setting that gives 8-piece high contrast JPEG pictures. Be that as it may, it is ideal to shoot in shading utilizing RAW. More data is caught in the RAW organization than JPEG. Another advantage of working in 16-piece is that is offers less hazard to posterisation, particularly in the event that you significantly increment difference or immersion.

In this way, the main concern for better highly contrasting pictures is to shoot in RAW, convert the record and work on it in some other photograph editorial manager in 16-piece.

There are various crude converters and picture processors in the market. For my work I use Photoshop and Lightroom 3.

Convert a Color Image

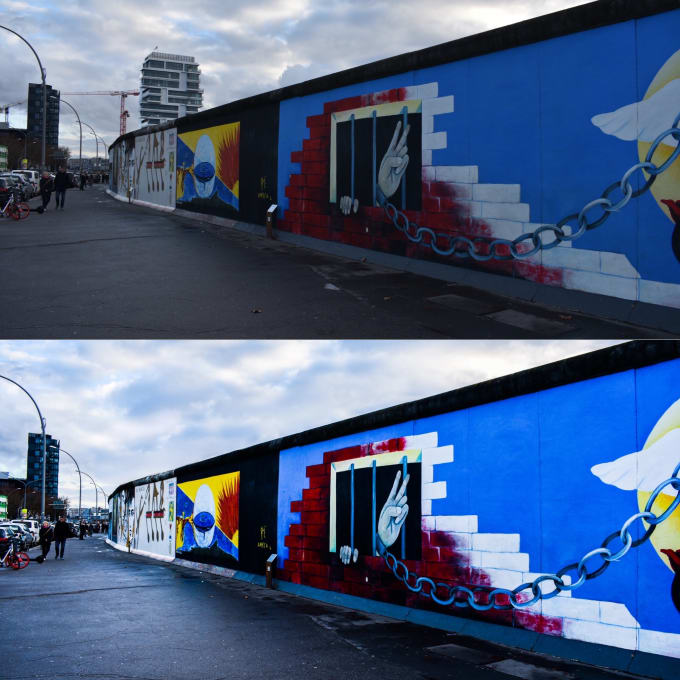
When shooting with film picture takers regularly utilize hued channels before the focal point to modify the picture.

For instance, a red channel removes a portion of the blue light from the sky while as yet letting through the red part of the white light reflected from mists. This outcomes in darker skies, which underline the mists. An orange channel is less sensational than a red.

With Digital Imaging we can utilize advanced channels and produce intriguing pictures.

I convert shading picture to highly contrasting utilizing Lightroom 3, at that point I use Photoshop to refine it.

There are different strategies to change over a picture to high contrast, from brisk and simple to progressively expand techniques.

Exclusive on fiverr by bernyelie

retouch clean edit any photo in photoshop and lightroom

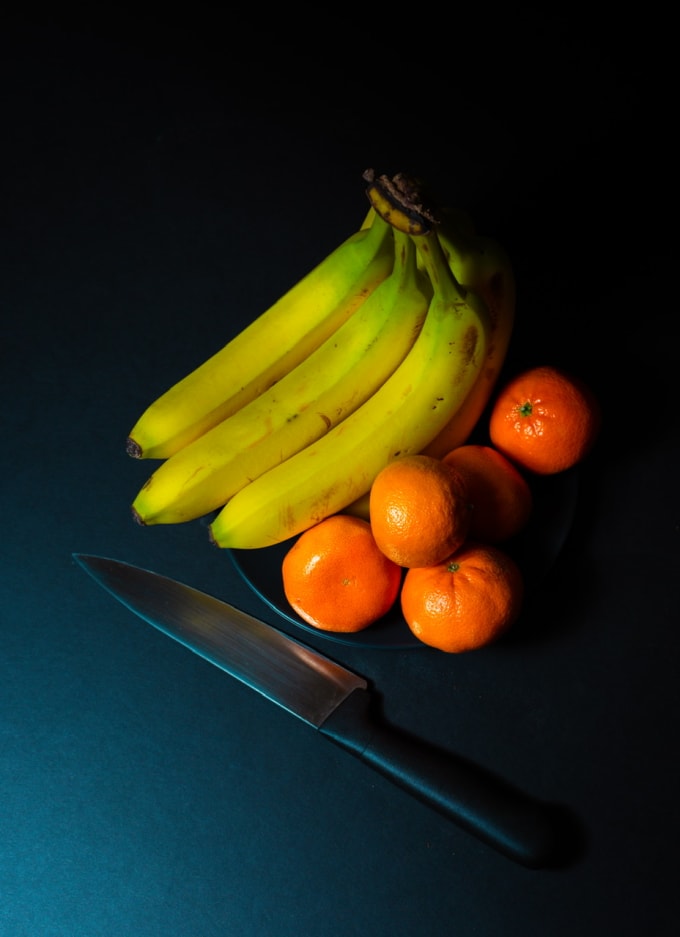
Convert to Black and White

Technique 1 – select

Picture – Mode – Grayscale.

When a crate shows up ask you “Dispose of shading data?

Snap OK.

Strategy 2 – select

Picture – Adjustments – Desaturate

Strategy 3 – select

Modifications – Channel Mixer – Tick the Monochrome box – Then move the switches, Red, Green and Blue, (for instance Red-44, Green=26, Blue=30). Change the qualities until you arrive at the look you like. You don’t must have the sums = 100.

There are numerous different approaches to change over a picture to high contrast, these three strategies give a decent beginning.

Wedding Photographers Photoshop Editing Tip:

http://bit.ly/2k08PxP

So you wonder what makes a few pictures look increasingly “proficient” than others. I pondered something very similar for quite a while until I at long last found the mystery. Also, that mystery is the enchantment utilization of difference.

On the off chance that you shoot in RAW (and I trust you accomplish for some different reasons that we will examine in another theme) at that point you most likely see that the pictures turn out looking rather level. As I would like to think, this is something to be thankful for. In the event that the photographs came straight out of the camera with an excess of difference connected.

Smothered features:

At that point you risk having smothered features or loss of detail in the shadows. As wedding picture takers, we can’t have that since a portion of the fundamental hues we shoot are white (wedding dress) and dark (tuxedo). Along these lines, today I am demonstrating how to add complexity to your wedding photographs without losing point of interest in your features and shadows. I am notwithstanding going to toss in a reward tip toward the part of the arrangement, so ensure and continue perusing.

Essential repairs:

Initially, we need a picture. I am accepting that you have as of now shading redressed your picture and played out the essential repairs. First thing we have to do is open the picture in Photoshop. I am at present utilizing CS5, however CS2 and up should work fine.

You will need to copy your unique layer:

A speedy method to do this is to tap on the first layer and press control + J (windows), or direction + J (macintosh). This will copy the chose layer. Since you have two of similar layers, we are going to concentrate on the top layer. We should feel free to name that layer. I find this is an incredible practice and prescribe you add naming your layers to your work process. I am going to name mine “differentiate”.

Mixing method:

After we name our layer, we have to change the mixing method of this layer. On the off chance that you look directly over the layer named “differentiate” you will see a drop down box that says “Typical”. We need to tap on this and select “Delicate Light”. When you do this you will promptly see that the picture has much more complexity. Indeed, it has excessively and does not look that great.

Bring down the difference a piece:

So as to make the photograph look better we currently need to bring down the difference a piece. We can do this by bringing down the haziness of the “differentiate” layer. I generally set my murkiness to around 60%, or somewhere in the vicinity. This is an abstract change and you can adjust this to your likings.

Supported features:

Since we have included complexity, we have basically supported our features and shadow regions. What we have to do is ensure that our complexity layer does not influence these features and shadow zones. We will do that by opening the layer properties and changing the manner in which the layer mixes the dark tones.

Open up the layer properties by double tapping on the “differentiate” layer. When the layer properties box is open you should modify the “Mix if: Gray” esteem so that our “differentiate” layer does not influence the features and shadows, inside a specific range that we indicate.

Principal number alongside :

Exclusive service on fiverr By wayanpastrana

http://bit.ly/2k08PxP

We need to move the slider on the dark (left) side, to one side until the principal number alongside “This Layer:” is 10. After that hold down the ctrl (Windows), or direction (Mac), while you are as yet floating over a similar slider and start moving it to one side, much more, until the subsequent number is 30.

You will see that this will part the slider into two:

What this is doing is mixing the shadows so that there isn’t a sudden change in the tonal worth, for this would not look satisfying. Do something very similar to the white (right) slider until the numbers are (from left to right) 225 and 245. So from left to directly from the “Mix if.

Gray”, we have 10/30 225/245. Basically, what we have done is advise the layer not to change any of the feature or shadow esteems in a specific range and to likewise mix the qualities that we changed with the ones from the first foundation layer. Know more visit the official website http://bit.ly/2k08PxP